Welcome to the U.S. Army War College (USAWC)
Distance Education Program Device Configuration Website
Unit 3: Microsoft Windows, MAC, and Mobile Setup
TO ACCESS BLACKBOARD:
With the Advent of DDE's use of Blackboard for Courseware Delivery you do not need to configure your system, as Blackboard is designed to be implemented with little to no System Configuration. All you will need to access Blackboard is your Username and Password. You can use any Browser or Operating System (Windows or MAC) to access your Courseware. Blackboard is accessible on various mobile devices such as Android and IOS compatible devices.
TO ACCESS COMPASS:
Compass Configuration is minimal and most out of the Box Computer Configurations running Windows 7, 8.x, and 10 are acceptable. It is recommend that if you use Internet Explorer version 9 or higher. Most computers running Windows 7, and 8.x will have version 11 automatically installed. Windows 10 will have both the Microsoft Edge browser and Microsoft Internet Explorer (using Internet Explorer is recommended instead of Microsoft Edge browser, instructions below).
You will access Compass using your CAC, or username and password. Below are the steps for Configuring your System to use your CAC with Compass.
If you have questions as you go through it, do not hesitate to call 1-800-716-2769, M-F, 7:00am-4:30pm ET or email usarmy.carlisle.netcom.mbx.nec-service-desk-email@army.mil for help or clarification.
Windows Setup (MAC users scroll down to "MAC Setup")
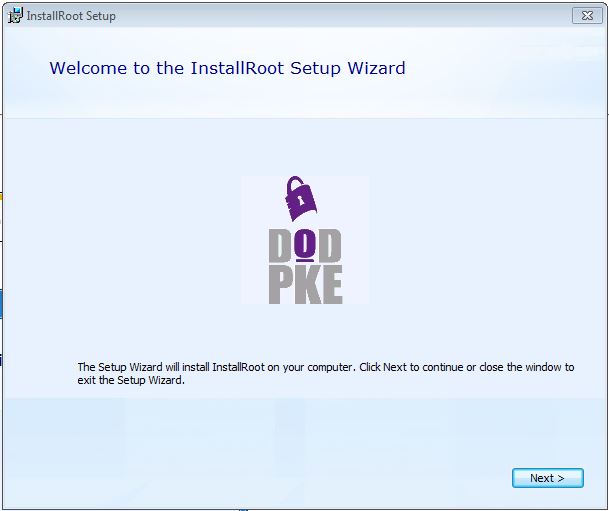
1. Install DoD Root Certificates
Supported Operating systems:
Windows 7
Windows 8.x
Windows 10
Supported browsers:
Internet Explorer 9, 10, 11, Microsoft Edge browser
Note: If you have a personal computer setup with a regular user account, elevate to the administrator
account before installing software.
If you have a US Government computer more than likely the DoD certificates are already installed.
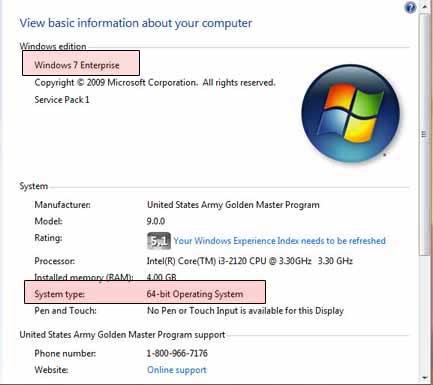
Before you begin installing the Root Certificate check which system type your computer is running. (64-bit or 32-bit).
Check Operating System info in Windows 10
Go to Start Start menu icon, enter About your PC, and then select About your PC.
Look under PC for Edition to find out which version and edition of Windows that your PC is running.
Look under PC for System type to see if you're running a 32-bit or 64-bit version of Windows.
Check Operating System info in Windows 8.1 and Windows 8 RT 8.1
Swipe in from the right edge of the screen, tap Settings, and then tap Change PC settings.
(If you're using a mouse, point to the lower-right corner of the screen, move the mouse pointer up,
click Settings, and then click Change PC settings.)
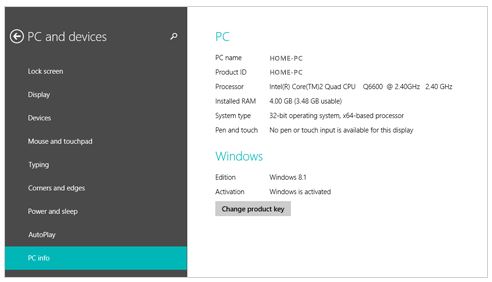
Tap or click PC and devices, and then tap or click PC info.
Look under Windows for the version and edition of Windows that your PC is running.
Look under PC for System type to see if you're running a 32-bit or 64-bit version of Windows.
Check Operating System info in Windows 7
Click the Start button, enter Computer in the search box, right-click Computer, and then click Properties.
Look under Windows edition for the version and edition of Windows that your PC is running.
Look under System for System type to see if you're running a 32-bit or 64-bit version of Windows.
Now choose 64-bit or 32-bit install below.
InstallRoot_5.0.1x64.msi (64-bit)
Click here for the 64-bit install.
InstallRoot_5.0.1x32.msi (32-bit)
Click here for the 32-bit install.
1. Click Run.

2. Click Next.
3. Click Next.
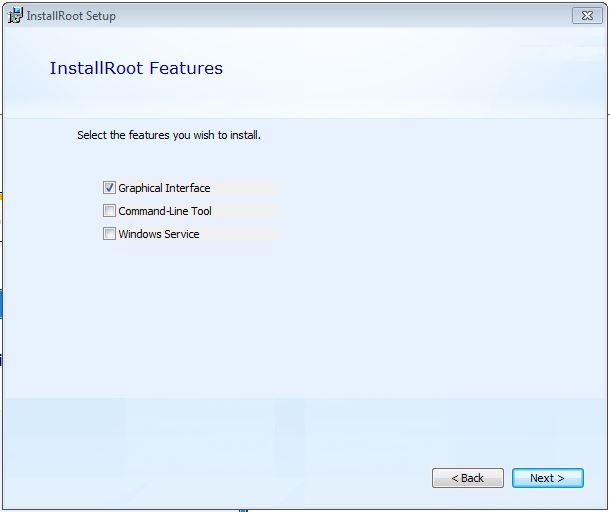
4. Select Graphical Interface only and click Next.
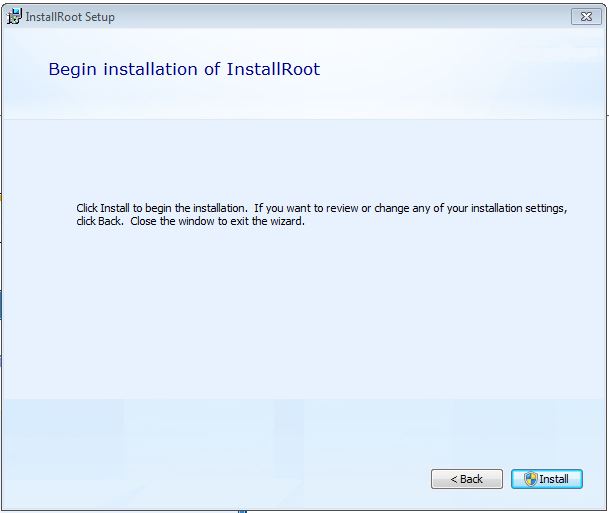
5. Click Install button.
6. Click Yes button.

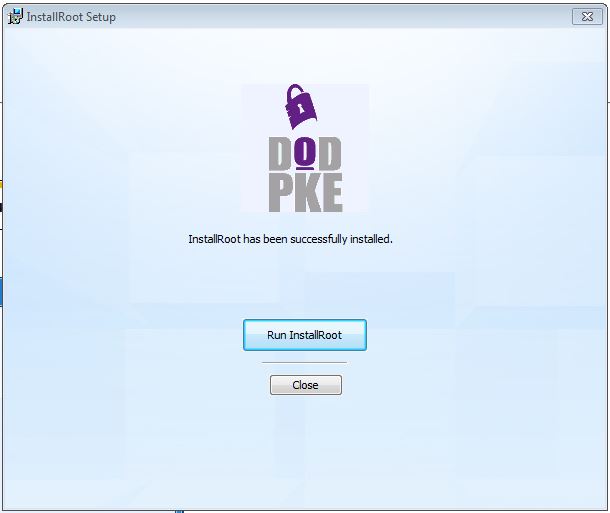
7. Click Run InstallRoot button.
8. Click Next.
9. Click Next.

10. Click Finish.

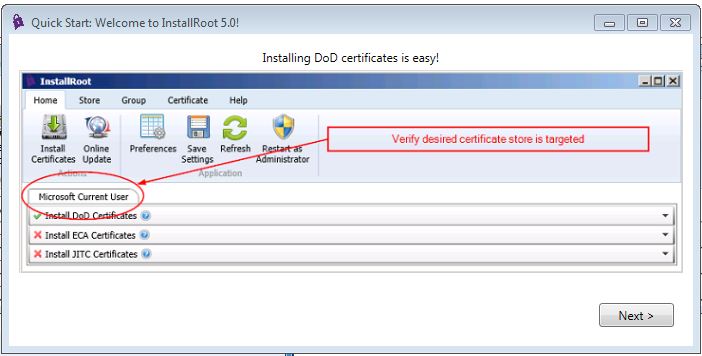
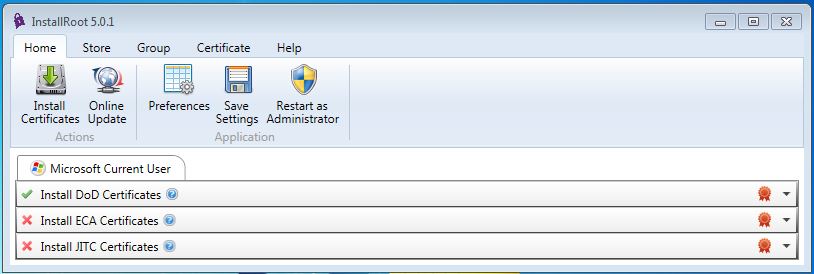
11. Click Install Certificates button.
12. Click Yes.
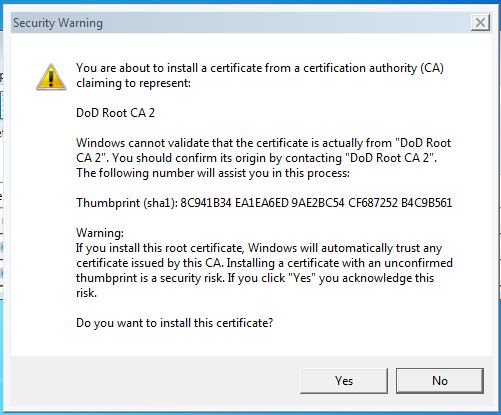
13. Click Yes.
14. Click Yes.
15. Click OK.
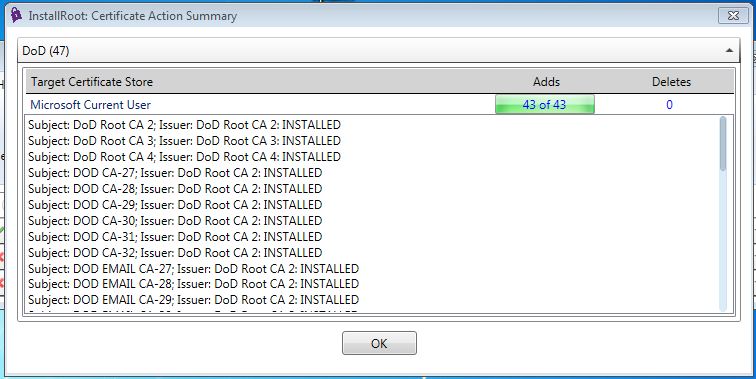
16. Click the X button in the upper right corner to close the dialog box.
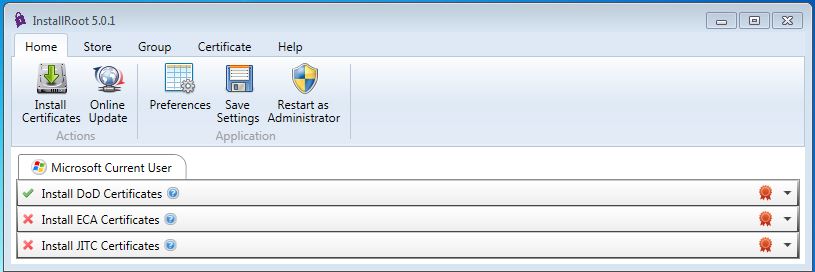
17. Click Yes.
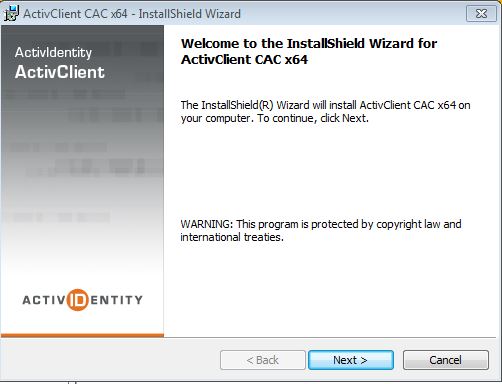
2. Install ActiveClient (Windows 7 Only)
ActiveClient Enables Your CAC Reader to Communicate with Windows.
This step should be completed for all PCs and Laptops that have Windows 7 installed that have a CAC reader attached.
- Windows 7 – Install ActivClient 6.2 and the hotfix below.
- Windows 8 – Do NOT install ActivClient. Windows 8 has a built in ability to read smart cards.
- Windows 10 - Do NOT install ActivClient. Windows 10 has a built in ability to read smart cards.
Here is how to find out which version of Windows 7 you have:
1. Click Start; Right-click Computer; Select Properties

2. Under the Windows edition section, note the version of Windows on your system.
3. Under the System section, for System type you will note either 32 or 64-bit Operating System.
How to install ActiveClient 6.2 for Windows 7
For systems running Windows 7 (64-bit)
Click here to install ActivClient 6.2. See how to install ActivClient 6.2 below.
For systems running Windows 7 (32-bit)
Click here to install ActivClient 6.2. See how to install ActivClient 6.2 below.
1. Click Run.

2. Select Next.
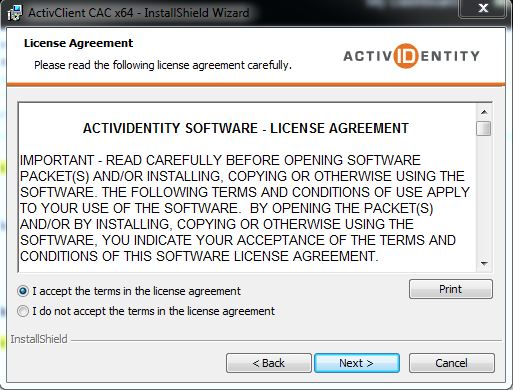
3. Read, then select "I accept the terms..." select Next.
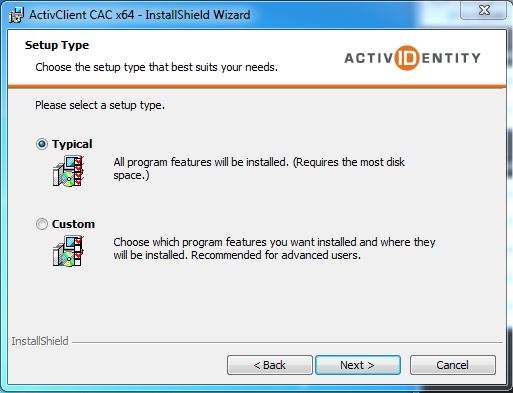
4. Verify Typical is selected, select Next.
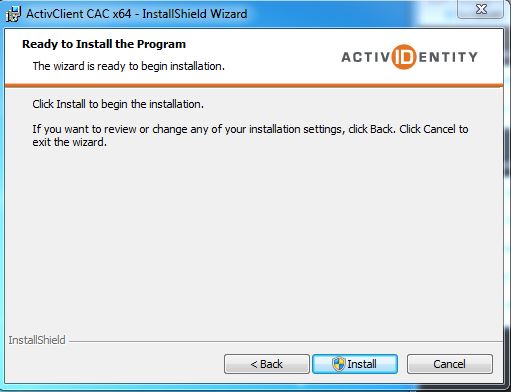
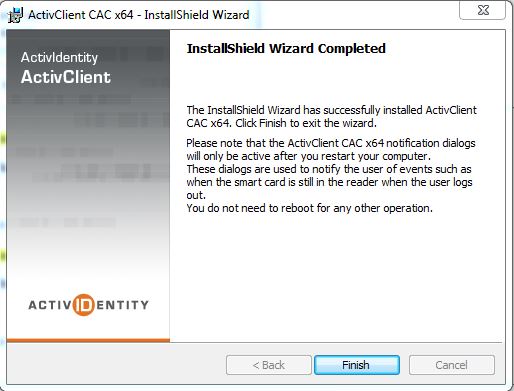
5. Click Install.
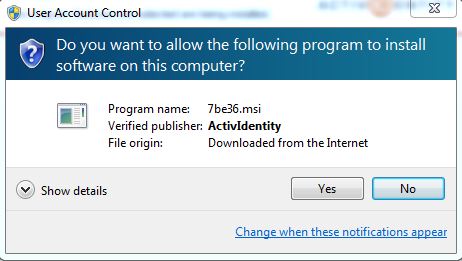
6. Click Yes to the User Account Control prompt to allow ActivClient to install.
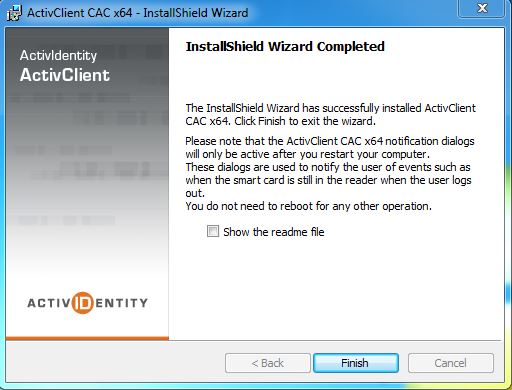
7. Uncheck the Show the readme file box (unless you want to read it). Click Finish.
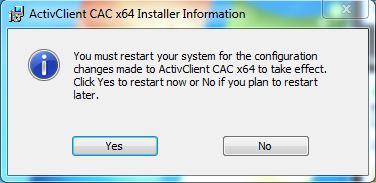
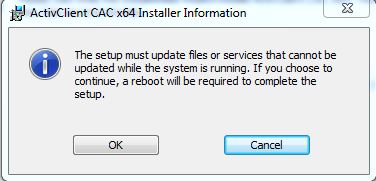
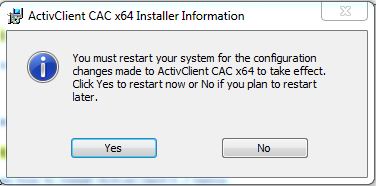
8. NOTE: 64 bit versions of ActivClient usually prompt for a restart of your computer, So, if requested, click Yes to restart your computer.
How to install hotfix for ActiveClient 6.2 for Windows 7
For systems running Windows 7 (64-bit)
Click here to install hotfix for ActivClient 6.2. See how to install hotfix for ActivClient 6.2 below.
For systems running Windows 7 (32-bit)
Click here to install hotfix for ActivClient 6.2. See how to install hotfix for ActivClient 6.2 below.
1. Click Open.
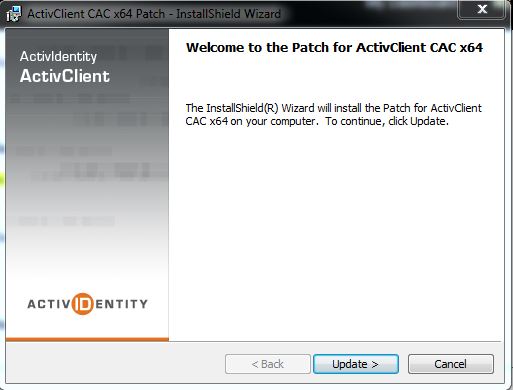
2. Click Update.
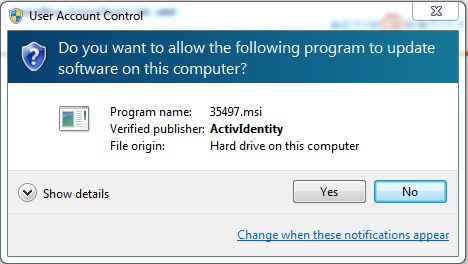
3. Click Yes.
4. Click OK.
5. Click Finish.
6. NOTE: 64 bit versions of ActivClient usually prompt for a restart of your computer, So, if requested, click Yes to restart your computer.
3. Windows 10 users, the default browser is Microsoft Edge. Using Internet Explorer is recommended instead of Microsoft Edge browser.
Follow these steps to add the Internet Explorer icon to your taskbar.
1. Click the Start button in the lower left corner.
2. Click All Apps.
3. Scroll down and click Windows Accessories.
4. Right click Internet Explorer and click More at the top.
5. Lastly click Pin to taskbar.
6. You will notice Internet Explorer on the taskbar at the bottom of the screen.
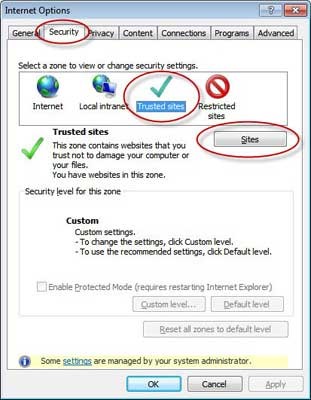
4. Add DDE website as a member of trusted sites in your Microsoft Internet Explorer browser
If you are already in Internet Explorer viewing this step you may want to open a second window or Tab to facilitate viewing the instructions while performing the steps.
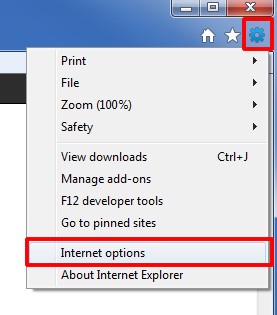
1. Click Tools or Gear Symbol then Internet Options.
2. Click on the Security tab. Click on the Trusted Sites icon. Click on the Sites button.
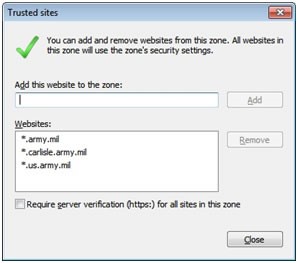
5. If the "Require server verification (https:) for all sites in the zone" is checked, uncheck.
In the "Add this web site to the zone" box, enter *.us.army.mil and click the Add button, enter *.carlisle.army.mil and click the Add button, enter *.army.mil and click Add button.
Once the addresses are in the Websites field, click Close.
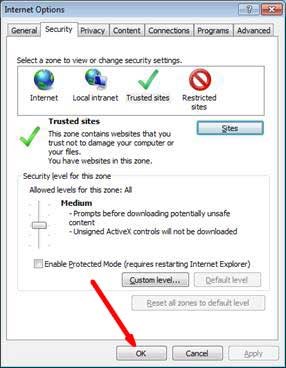
6. Click Ok to close Internet Options.
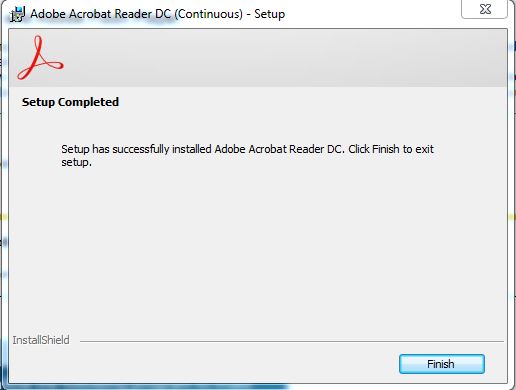
5. Install Adobe Reader
Most MAC and Windows computer systems will come with Adobe Acrobat Reader preinstalled, and chances are your currently computer already has Adobe Reader installed on it.
But, in case you do not, below is the link to installing Adobe Reader. You will need Adobe Acrobat reader installed to view PDF's.
Note: if you need to install Adobe Acrobat Reader on your work computer, make sure you follow your agencies software installation policy.
Adobe PDF Reader
1. Click here to install the Adobe PDF reader (for windows 7/8.x/10).
2. Click Run.

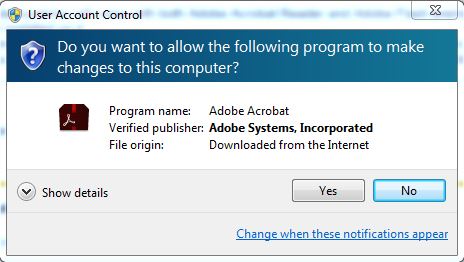
3. Click Yes.
4. Click Install.
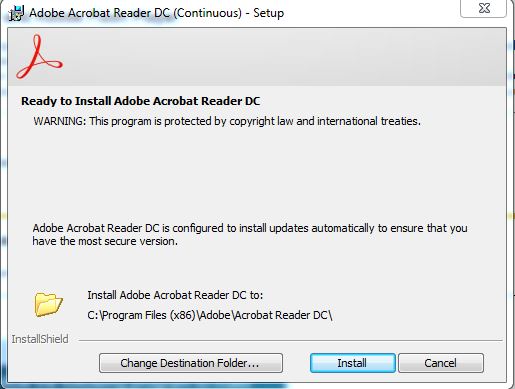
5. Click Finish.
6. Using Blackboard Collaborate for Windows
1. Login to Blackboard using username/password.
2. Click My Courses link at the top.
3. Click DE2300: Orientation to Strategic Leader Education link.
4. Scroll down and click the "Collaboration Area" link on the left side of the screen.
5. Click the "Join Room" button.
6. Click the "download the Blackboard Collaborate Launcher" link.
7. Click "Download Launcher" button.
8. You will notice a box at the bottom of the screen that show "Do you want to run or save
Blackboard CollaborateLauncher-Win.msi (40.8 MB) from na-downloads.elluminate.com?"
Click run.
9. You will notice at the bottom of the screen that BlackboardCollaborateLauncher is
installing. This may take a few minutes. Do not close the Install the Launcher dialog
box.
10. Click Next to the Blackboard Collaborate Launcher Setup dialog box.
11. Click Install.
12. Click Finish.
13. Click Ok to close the Install the Launcher dialog box.
14. At the bottom of the screen you will notice a prompt "Do you wnat to open or save
meeting.collab (9.48) from usawc.blackboard.com.
Click Open.
15. Wait until downloading application box is completed.
16. On the Blackboard Collaborate box click Accept.
17. Choose a connection speed. (Cable/DSL)
18. Click Ok.
7. Blackboard Collaborate for Mobile Devices
Two apps (Blackboard Mobile Learn and Blackboard Collaborate) you will need for DDE:
 Blackboard Mobile Learn
 Blackboard Collaborate
1. Go to your apps store and Download Blackboard Mobile Learn and Blackboard Collaborate
2. Once you have download both, Login to Blackboard Mobile Learn with your USAWC Blackboard Account
3. Once logged in, access one of your courses (DE2300 or DE2301) and click “collaboration area” on the left table of contents, then click join room (for DE2300 or DE2301 main room). Then, click join again. This will automatically open the collaborate app on your smart device and log you into blackboard collaborate.
NOTE: You will not have camera or chat capability at this point, because your faculty instructor needs to give you access. You have successfully completed, if you see the open room.
8. MAC Setup
CONFIGURING A MAC TO UTILIZE A CAC
For information on configuring a MAC computer to utilize a Common Access Card (CAC) to access websites, users should follow the below steps:
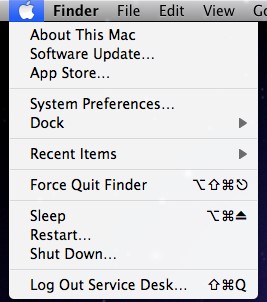
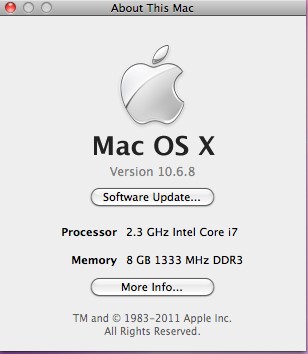
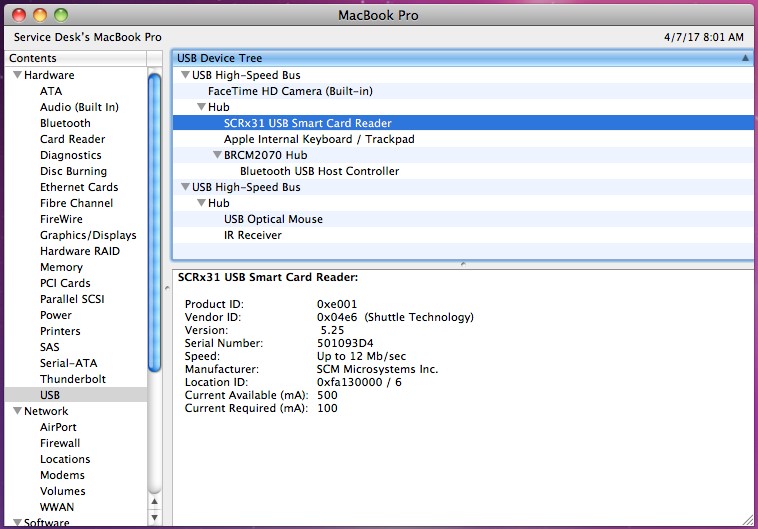
1. Verify that the CAC reader is being recognized by the Operating System. Go to the upper left hand corner and click on the Apple icon and click About This Mac
2. Click More Info (verify which version you have for the next steps)
3. Click on USB
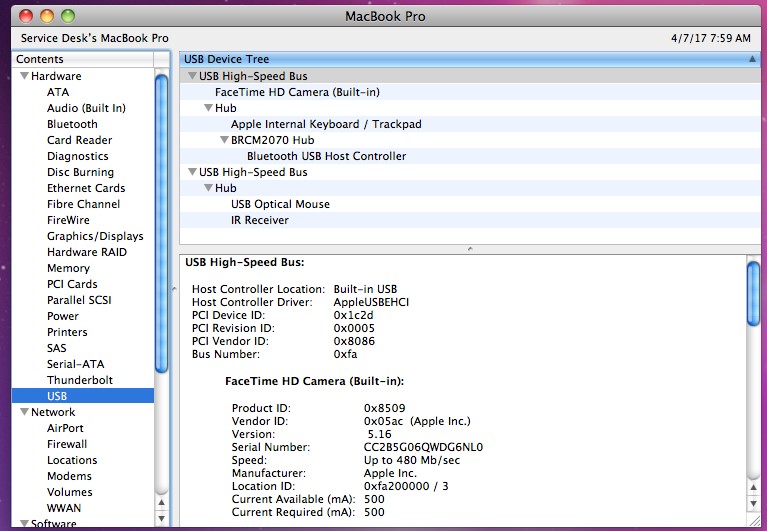
4. Verify that a CAC reader is showing up under the USB Tree
5. CAC reader software. (Check MAC OS version from step #2)
MAC OS 10.12 click here.
MAC OS 10.11 click here.
MAC OS 10.7, 10.8, 10.9, 10.10 click here.
MAC OS 10.6 click here.
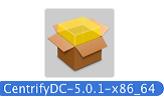
6. When the download completes, open the download and double click the Installer Package. (Icon looks
like the one below)
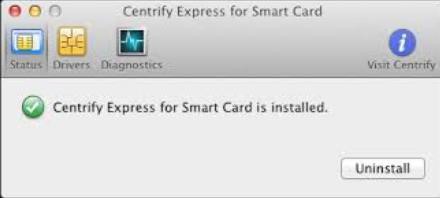
7. Follow the prompts on the screen to install Centrify.
NOTE. There are will be several screens you will need to click Next, Install or Agree until the software
Installs. Once installed, it will open the Centrify program. This will be similar to the screen below. Click the
Yellow circle to minimize the application below.
8. Click Close on the installer window
9. Click the Red circle to close the downloads folder (if open)
10. Install DoD Root Certs click here.
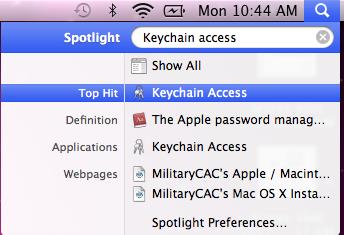
11. Click the magnifying glass icon in the upper right corner to open the Spotlight Search. Type Keychain
Access and hit Enter on your keyboard.
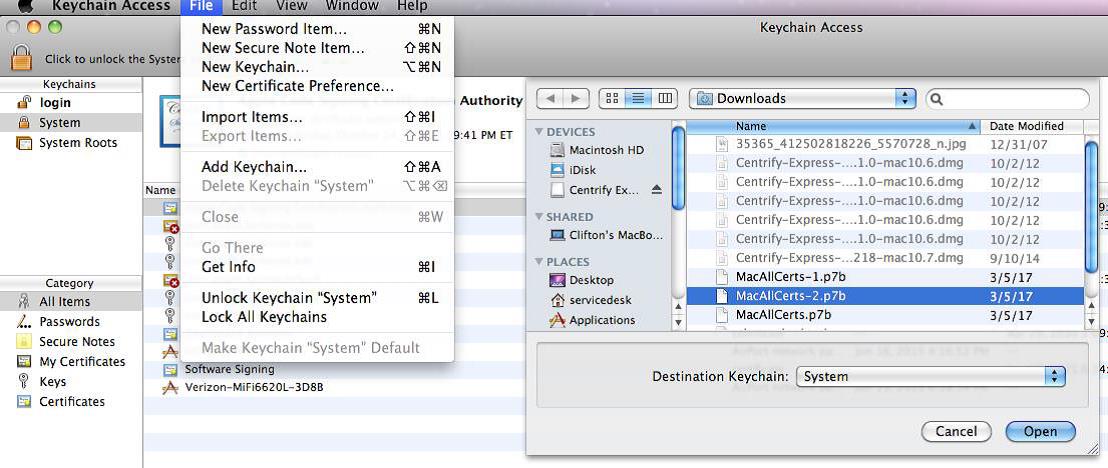
12. When the Keychain Access application opens, select System on the left side of the screen under
“Keychains” click on File at the top of the screen and select Import Items… Navigate to the Downloads
and click the .p7b file that you just downloaded in the previous step. Then click Open. (you may need to
provide the password you use to login to the computer at this point).
13. Close the Keychain Access window and all Safari windows.
14. Plug the CAC Reader into your computer and insert your CAC in the reader.
15. Navigate to https://web.mail.mil. Click OK on the terms and conditions page and you should now be prompted to select a Certificate.
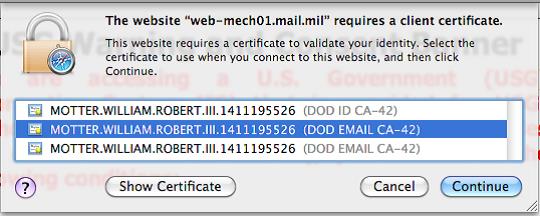
Note. Make sure you are selecting your DOD Email certificate!
Note 2. If repeatedly prompted to select a certificate, try selecting the 2nd DOD EMAIL Certificate.
16. You should then be in OWA. If this is not working, please follow troubleshooting steps in the MAC
Troubleshooting document.
17. We also recommend the Military CAC website for guidance if you have issues.
9. MAC TROUBLESHOOTING TIPS
For information on troubleshooting a MAC computer that is unable to utilize a Common Access
Card (CAC) to access websites, follow the steps below:
Verify the CAC is being read
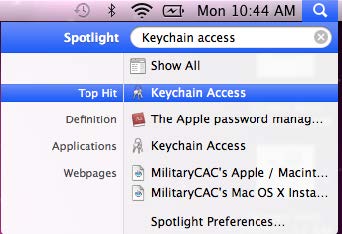
1. Click the magnifying glass in the upper right corner of the
screen to open the Spotlight Search.
2. Type Keychain Access into the search and click Enter
on the keyboard.
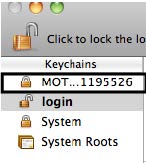
3. When the Keychain opens, verify that the users
certificate is listed under Keychains. (pictured below)
4. If not listed, restart the device with the CAC Reader and CAC
plugged into the device. When a reboot is complete, check again. If it is still
not showing, follow steps to install drivers for the CAC Reader.
Note. Sometimes unplugging the CAC reader and plugging it back will resolve
the issue.
Clear the Keychain for OWA
1. Open the Keychain Access by following the above steps.
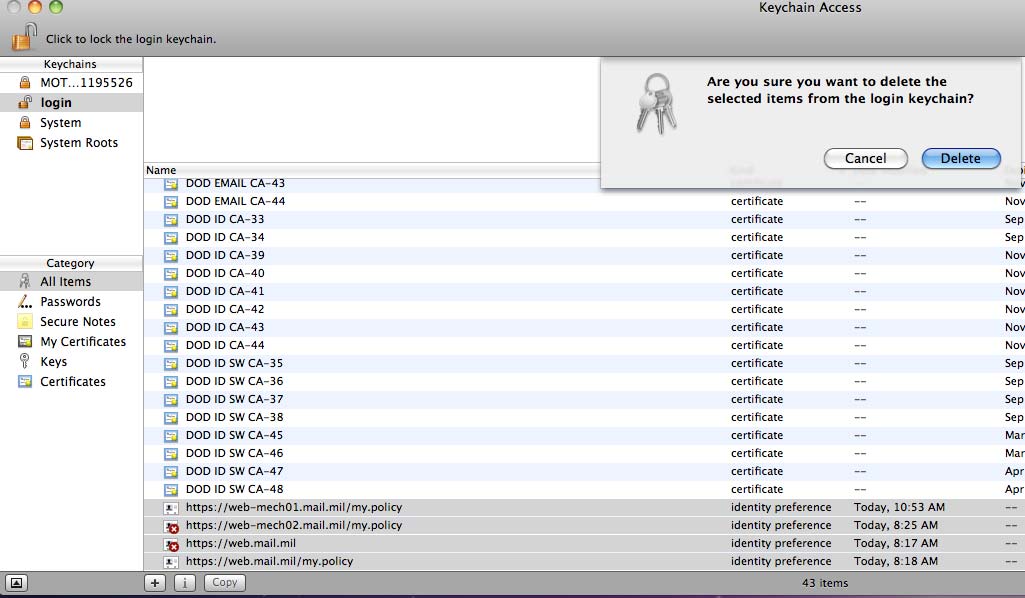
2. Make sure that login is selected under Keychains and Category should have All Items selected.
Click on the column heading labeled Kind to sort the list. Find the certificates with Identity
Preference as the “Kind”.
3. Highlight any identity preference that has mail.mil in the Name column. Click Delete on the
keyboard and then click Delete on the window that appears asking “Are you sure”
4. Try to access OWA again, making sure that you are selecting the DOD EMAIL certificate.
Note. Follow these same steps to clear the Identity Preference for other websites, but make sure
the Name column shows the site that you are experiencing troubles with.
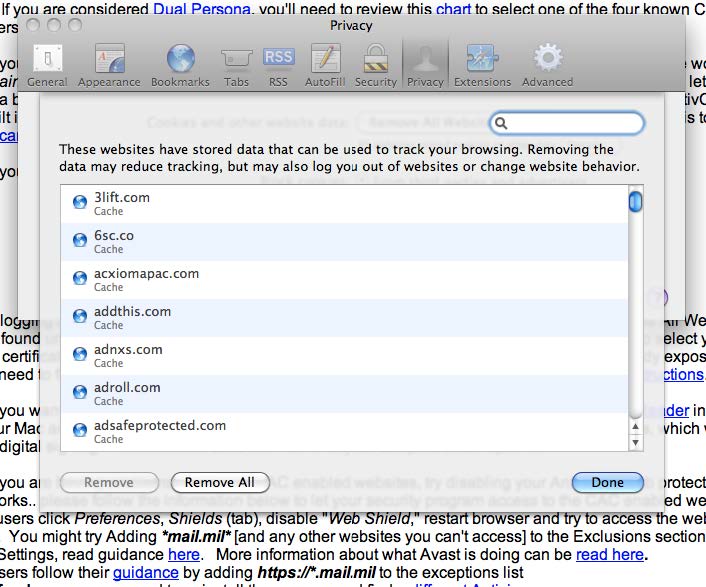
Clear Cache and History in
Safari
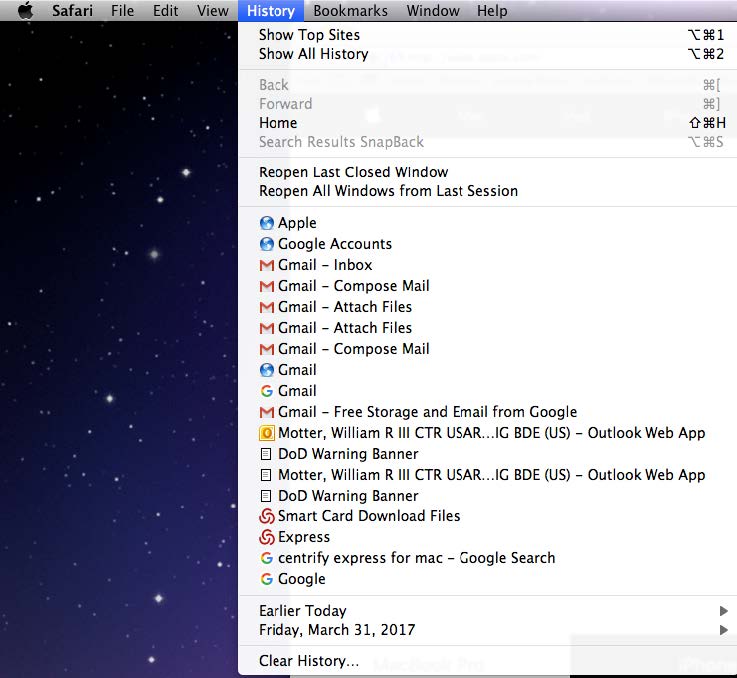
1. Open the Safari browser.
2. Click History in the menu bar at the top of the
screen.
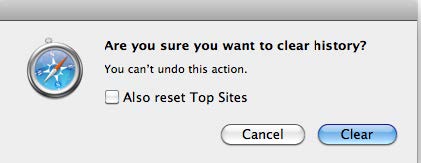
3. Click Clear History… at the bottom of the list.
4. Click Clear to confirm on the following window
that appears.
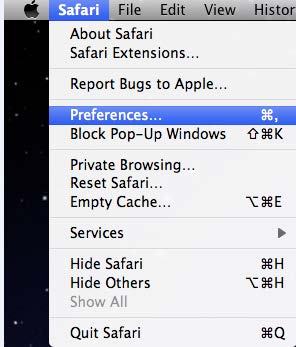
5. Click Safari from the menu bar and select Preferences…
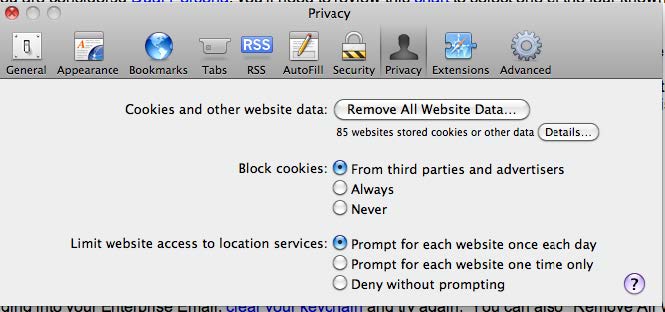
6. On the Preferences window, click the Privacy tab and click on the
Remove All Website Data… button.
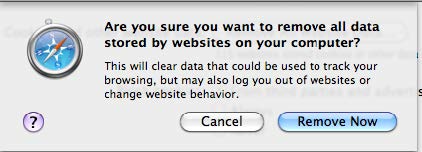
7. Click Remove Now on the
window that appears.
8. You can also click Details… on the window pictured above
to view the sites that have information cached on your device.
9. Click Remove All on this window and then Done.
10. Mobile Device Setup
Courseware Access:
Accessing DEP Courseware in Blackboard using a Mobile Device (iPad, iPhone, Windows Tab, Android, etc.) can be accomplished by navigating to the USAWC DEP program's website (/ ) with the device's browser i.e. Safari, Firefox, Chrome, I.E. etc. No Configuration of your Mobile Device is required to Access the Courseware from the Device's Browser. Sometimes the Web Interface is not conducive to the display within a Mobile Device. Blackboard offers a Mobile App via Apple's App Store for IOS devices, and Google Play Store for Android devices. Currently, there is no Mobile App for Window's Tablet but you can access Courseware via the Website (/).
Compass Access:
Accessing Compass via Mobile Devices is similar to accessing Compass via a Laptop or Desktop Computer. There are no Mobile Apps you can download to access Compass . As a student you are able to login to Compass using your Device's Web Browser and your User ID and Password or your CAC card. Note: There is no guarantee that Compass will function correctly on all devices or Mobile Web Browsers; the USAWC's IT Helpdesk can only help you with Compass Access and Connectivity problems on a Windows 7 or higher Laptop or Desktop.
Mobile Device CAC Access and Setup:
CAC read and be attached to your Mobile Device enabling you to access Compass and or other websites that require a Military CAC. The following link will guide you through everything you need to Install and Configure your Mobile Device for Military CAC use:
http://militarycac.com/mobile.htm?iPhone_and_iPad
The above link has information on Windows Tablets, IOS Devices, and Android Devices regarding CAC Readers for each Device, CAC Reader Software Installation and Configuration Instructions, as well as CAC Reader Purchasing Information.